Test an API with Karate: Part 1
Photo by Marc Chong Seng on Unsplash
Overview
Karate is a modern testing tool built with Java that allows for automated testing in many ways, such as API Testing, Performance Testing, and even UI Testing. In addition, Karate utilizes behavior-driven development (BDD) Gherkin syntax to write tests. Unlike many tools such as Cucumber, with Karate, you don't have to write the underlying step definition code for the Gherkin files, making it an excellent tool for all users, including those with limited coding experience.
For purposes of this blog series, we will learn Karate features by writing API tests for a Client Manager application I created with Next.js. Note: you can get up and running quicker by using the containerized version of the application I created here. Karate's documentation is clear and organized, so I will provide links to specific documentation when necessary instead of essentially regurgitating the same information.
Part 1
For the first part of the series, we will learn how to bootstrap a Karate project using Maven, complete a high-level overview of the project structure, and install Karate Runner for VSCode.
Application Overview
The application we will test allows users to display all clients via a GET api/clientsendpoint, display a single client via a GET api/get-client endpoint, add clients via a POST api/add-client endpoint, edit clients via a POST api/update-client endpoint, and delete clients via a DELETE api/delete-client endpoint. We will cover details of each endpoint, such as the expected request and response data, as we build out each test case.
Creating a Karate Project
One of the easiest ways to create a Karate project is by using the Karate Maven archetype. If you need more context, Maven is a popular tool used to build and manage Java projects. Maven archetypes are templates you can use as starter code for projects using desired tools.
You can also use the stand-alone executable via a downloadable ZIP release as an alternative to the Karate Maven archetype. The stand-alone approach is an excellent option if you have limited experience coding in Java or when you want to create a project using the quickest method.
Reviewing the Karate Project Folder Structure
The Naming Conventions section of the Karate docs highlights the resulting files and folder structure created by the Karate Maven archetype. One of the most notable things to understand is that we write Karate tests using Gherkin syntax in files with a .feature extension. The following is an example of a test written in Gherkin:
Feature: Login

Scenario: A user can login with valid credentials
  Given the login page
   When valid credentials submitted
   Then account page is displayed
For our project, we will change the default folders and files to the following:
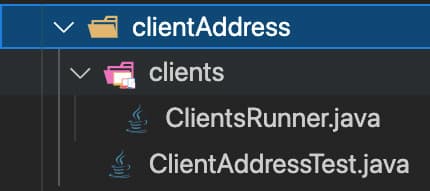
In the previous screenshot, the clientAddress folder houses related code for all our feature folders and files. The ClientAddressTest.java file runs the entire test suite, meaning all feature files in sub-folders such as clients. The ClientAddressTest.java file also configures reporting after test runs. The clients folder holds code specific to the "clients" feature. Inside the clients folder, ClientsRunner.java is used to run tests specific to the folder. The ClientsRunner.java file also allows you to customize test runs, such as filtering tests by tags.
Installing The Karate Runner VSCode Extension
If you are not using VSCode as your text editor, feel free to skip this section. The Karate Runner extension provides a pleasant experience using VSCode to run, debug, and view reports for your Karate tests. Install the Karate Runner extension via the Visual Studio Marketplace.
Installing Cucumber Reporting
By default, Karate provides reporting out of the box:

However, for our project, we will install and generate better-looking test reports using Cucumber Reporting. We can install the latest Maven version by adding it as a dependency to our pom.xml file which houses our project's configuration information and details:
<!-- https://mvnrepository.com/artifact/net.masterthought/cucumber-reporting -->
<dependency>
    <groupId>net.masterthought</groupId>
    <artifactId>cucumber-reporting</artifactId>
    <version>5.6.1</version>
</dependency>
Next, we'll update the ClientAddressTest.java file used to run the entire test suite, meaning all our project's feature files to use Cucumber Reporting for test results to the following:
public class ClientAddressTest {

  @Test
  void testParallel() {
    Results results = Runner.path("classpath:clientAddress").outputCucumberJson(true).parallel(5);
    generateReport(results.getReportDir());
    assertEquals(0, results.getFailCount(), results.getErrorMessages());
  }

  @SuppressWarnings("unchecked")
  public static void generateReport(String karateOutputPath) {
    @SuppressWarnings("rawtypes")
    Collection jsonFiles = FileUtils.listFiles(new File(karateOutputPath), new String[] { "json" }, true);
    @SuppressWarnings("rawtypes")
    List jsonPaths = new ArrayList(jsonFiles.size());
    jsonFiles.forEach(file -> jsonPaths.add(((File) file).getAbsolutePath()));

    Configuration configuration = new Configuration(new File("target"), "Client Address App");
    ReportBuilder reportBuilder = new ReportBuilder(jsonPaths, configuration);
    reportBuilder.generateReports();
  }

}
As a high-level explanation, the test testParallel runs all tests in the clientAddress folder suite and passes the test result data to generateReport. The generateReport method will create a nice-looking visual report titled "Client Address App" and store it in the target folder.
Now that Cucumber Reporter is installed and configured, we can generate reports like so:
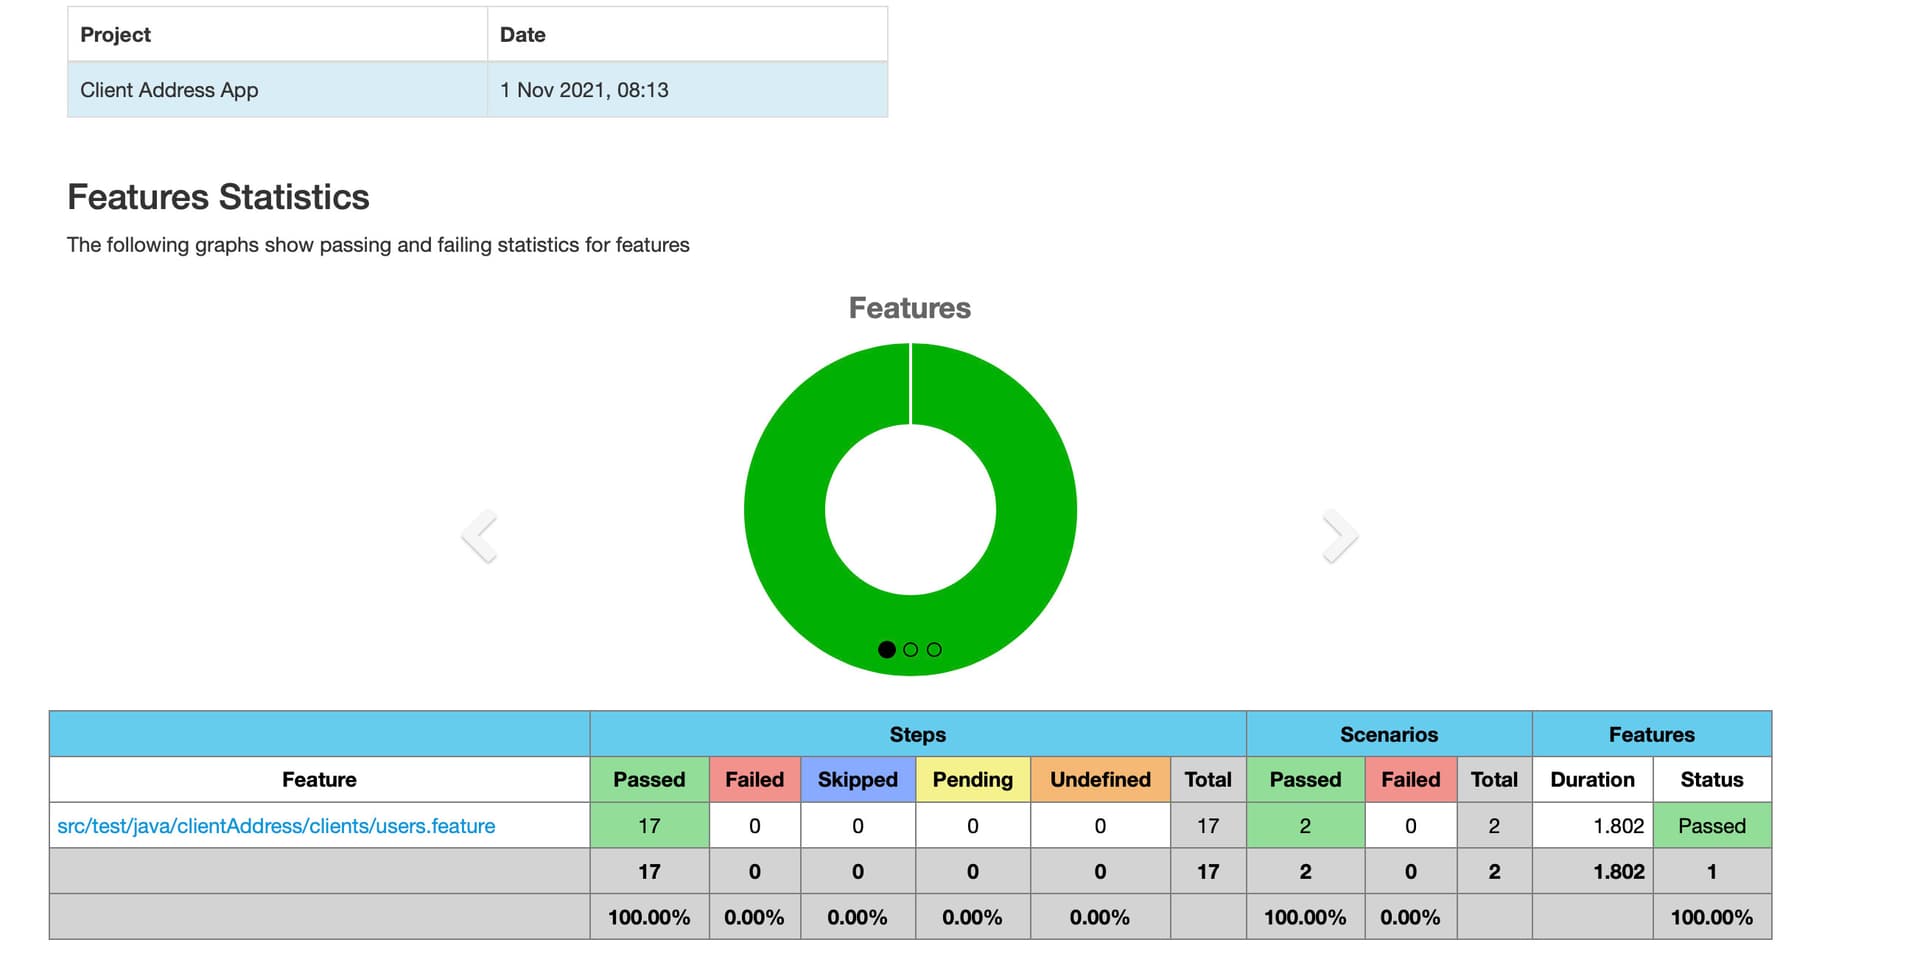
The previous screenshot shows a pie chart and a table displaying detailed information about the latest test run. We can also select the feature link to get more details about what happened during each step of the test run.
Part 1 Review
In review, now we understand the usefulness of Karate for testing. Next, we reviewed the application we will test throughout the series. Finally, we learned how to create a starter Karate project. Next, we will learn how to configure Karate for our needs and test the GET api/clientsendpoint.